Showing posts with label Advanced Squad Leader: Red Barricades. Show all posts

Tuesday, November 26, 2019

RB/RO CG: Fire on the Volga (Pt. 3)

Note to readers: This post won't make a lick of sense to anyone who isn't familiar with the Advanced Squad Leader game system.

Specifically, Stewart King and I are undertaking to play a modified CG that combines the Red Barricades and Red October boards and OBs to become a massive, all-encompassing campaign that runs for 30 CG days! I attached the moniker "Fire on the Volga" and undertake here to maintain a blog of the CG as we progress. Stewart is an old friend and has agreed to refrain from reading my blog until such time as I give him permission.


Feel free to leave comments. Let me know if you think my setup is crazy, or if you find my strategy hopelessly flawed. Just be sure not to reveal anything about my game to Stewart (nor vice-versa).


Aftermath of CG Day 2

Bleak, baby. Bleak. Like Yevgrev says in Dr. Zhivago: "Even Comrade Lenin underestimated both the anguish of that nine hundred mile-long front, and our cursed capacity for suffering." 

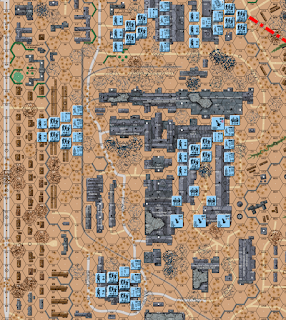
The attack on the Chemist's Shop mostly succeeded, but Stewart yet clings to hex Z10, the southernmost of the building. The riverbank hangs like ripe fruit before my eyes, but is yet ungrasped. Along the railroad tracks we met with only slightly greater success than expected. After all, a savvy Russian player is not going to fight too hard on the western board edge. It's a fool's errand.  In the factories, we took only what the Russians ceded. Behold, the perimeter!

Continuing with the previous day's progress 

Stewart fought tenaciously to hold the Chemist's Shop. My attack stalled  in the trench at the very door of the (thoroughly-fortified) building. I made a risky decision, moving my 10-2 kill stack from his position on the 1st level of N5 over to the rooftop of hex P6. There were 2 modules of Red 80mm mortar dropping nearby, but I found the gap in his OBA missions, got up there and, as 10-2 kill stacks tend to do, laid waste to the Russian defenses.

My retained forces are strong, especially with my battle-hardened 10-3, who will be directing machinegun fire very close to the front lines on the coming day. But my Sturm troops are reduced to a depleted company, which more or less dictates that I buy a Sturm Company with my allotted 17CPP for the day. Here's what I've got.

Retained forces: 
  • 10-3, 10-2, 9-1 x 2, 8-1, 8-0 x 3, 7-0 x 2
  • 548 x 8.5
  • 468 x 5
  • 467 x 26
  • 447 x 4
  • HMG x 3, MMG x 5, LMG x 4, Atr, x 3, Lt. Mtr. x 3

I've still got 2 full companies of rifle troops, which bodes well for the next few days. Since I'm compelled to buy a Sturm company, I will do so. And since I'm still fairly close to the board edge, armor is a good substitute for a second company of infantry. 

I suspect Stewart has set up some nasty Russian MG nests in the Commissar's House. But I've got a Mortar OBA module that will smoke up that observation point, should it prove necessary. My 10-3 kill stack is set up to move into the first level of the Chemist's Shop as soon as the opportunity presents itself, from which location he will serve as overwatch as my Sturm troops on to the wire and trench line that Stewart has developed on the approaches to the Commissar's House. (I have definitely noticed that, as per our CG SSR) the Russians have a lot more fortifications than normal. And while it may have slowed my progress on the map, the casualties so far have still been about what one would expect.)

Here's what I bought:
  • I3 Sturm Company
    548 x 12
    MMG, LMG x 2, DC x 2
    9-1, 8-1, 8-0
  • A4 PzIIIH Platoon
    PzIIIH x 3
  • O5 Offboard Observer (Hex Q1)
  • O2 80mm Mtr OBA
    Normal Ammo
Not much imagination to my assault, I'm afraid. Push to the river! Attack the Russian flank. These things write themselves...

Friday, November 01, 2019

RB/RO CG: Fire on the Volga (Pt. 2)

Note to readers: This post won't make a lick of sense to anyone who isn't familiar with the Advanced Squad Leader game system.

Specifically, Stewart King and I are undertaking to play a modified CG that combines the Red Barricades and Red October boards and OBs to become a massive, all-encompassing campaign that runs for 30 CG days! I attached the moniker "Fire on the Volga" and undertake here to maintain a blog of the CG as we progress. Stewart is an old friend and has agreed to refrain from reading my blog until such time as I give him permission.


Feel free to leave comments. Let me know if you think my setup is crazy, or if you find my strategy hopelessly flawed. Just be sure not to reveal anything about my game to Stewart (nor vice-versa).


Aftermath of CG Day 1

I'm very satisfied with the results of the day. Behold, the perimeter!

Perimeter, end of CG Day 1.
Not so impressive, eh? Yes, I did destroy his trench-and-wire fortifications, got across the V hexrow and, made progress toward the Chemist's Shop, but that's barely hitting par as the Germans on Day 1.

The real story of the day was the destruction visited upon the Russian forces. As I stated in my previous post, I thought the Reds were set up too far forward. Between that and Stewart's natural tenacity and stubbornness on defense (I've been playing him for years) CG Day 1 was a Russian disaster.

The CVP totals tell the tale. Germans suffered 20 CVP. Russians suffered 63 CVP. The Reds got tripled up! Despite their numerical superiority in the overall CG, that ratio is unsustainable. Stewart will have to find a way to adjust.

In a more or less textbook blitzkrieg manuever, I was able to use my armor to bust through his line at several points (the Workshop Warehouse and his wire and trench line in the U-W hexrows) and follow up with my infantry, cleaning up behind the maurauding AFVs. In that way, I destroyed a lot of his troops for failure to route. My MG kill stack swept his mortar and ATR troops off the rooftops, and I captured a Russian HMG in L5. Stewart mounted a successful minor counterattack from building Z1 and drove me back a couple hexes, and he threw me out of Building K10 in another. But his losses were severe.

The day was punctuated by a 7 CVP score on the last turn of the game, when my Sturm squad placed a DC, rubbling hex F13 which contained 3 squads and a 9-0 commie.

German losses consisted of a PzIIIL and roughly 2 platoons of infantry.

My triumph was somewhat mitigated when I rolled boxcars to have both of my armored platoons recalled. But, as per SSR #6 for this CG (see Prelude) I'm compensated 4 CPP for the next CG day, since the recall involved 4 fully-functional AFV. 

The Reds lost about 2 companies of infantry and a 45LL ATG.

The day that is to come

Although my perimeter does not extend as far into the board as I might have expected, I'm nonetheless pleased that I have established my entry area to the east of hexrow V, which opens up the approach to the riverbank.

As I see it, I've got 3 avenues of attack.

  1. Chemist's Shop and river bank.  This is my default choice. I've mostly destroyed his fortifications by the river and it makes little sense to lay off now and let him regain his strength. And while Stewart may well predict this attack, he's so weak right now that there is not much he can do to stop me from gaining the riverbank and probably even the Chemist's Shop. This will be my primary attack for the coming day.

    But I have enough strength to also mount a secondary attack as well, which will be either of the following two options, depending on how I perceive Russian strength to be deployed.
  2. Bust my way down the railroad tracks and make a grab for the Power Station. This is a safe attack. Reinforcements can join the battle immediately, entering from the western board edge, and any Russians any the area will be overwhelmed quickly.
  3. Into the factories. I don't want to fight in the factories unless I must. The Russian fanatic bonus makes even conscripts (which are sure to be there) dangerous. There is nothing worse than losing a Sturm squad to a Conscript in factory close combat. However, if I perceive the center to be overly weak, I will charge into the factories, if for no other reason than to stretch the perimeter.
My retained forces from Day 1 are these:
  • 10-2, 9-1 x 2, 8-1, 8-0, 8-0 (wnd), 7-0 x 2
  • 548 x 18
  • 468 x 2
  • 467 x 4
  • 447 x 2 
  • HMG, MMG x 3, LMG x 5, Atr, DC x 3
I've got 1.5 companies of Sturm troops, which means the German spear point is still honed and lethal. This bodes well for Day 2.

I'm awarded 17 CPP (remember, in this CG, Stewart and I are ignoring all CPP replenishment modifiers other than the historical modifiers), plus the 4 CPP I received for my recalled AFV, which yields 21 CPP for the day! My purchases are these:

  • I1 Rifle Company
    467 x 12
    HMG, MMG, LMG, Lt. Mtr. Atr
    8-1, 8-0
  • I1 Rifle Company
    467 x 12
    HMG, MMG, LMG, Lt. Mtr. Atr
    10-2, 8-1, 7-0
  • A5 PzIIIL Platoon
    9-1 AL
    PzIIIL x 3
  • O5 Offboard Observer (Hex Q1)
  • O2 80mm Mtr OBA
    Normal Ammo
Two Rifle companies for the day. I'll buy them now, while I can. In my experience, the Germans are rarely afforded such a luxury, and since I have it, I'm going to use it. In the later game, my purchases will be constrained by competing demands for support and manpower.

My AFV withdrawal reimbursement of 4 CPP goes directly to buying another PzIIIL platoon. The net effect of our new SSR, then, is that I came out more-or-less with a wash. Four AFV withdrawn, 3 purchased with the resulting CVP.

The tactics for Day 2 will be much the same as Day 1. Schwerpunkt, aimed at the Chemist's Shop. I'm hoping the momentum of my attack will carry me beyond my primary objective and on to the approaches of the Commissar's House.

And away we go!

Stewart is discouraged after the whipping he took on Day 1. But the Reds can recover from disaster. As the German advances across the board, he moves beyond the effective range of his offboard observers and increases the distance his reinforcements must travel to reach the action. That is, he becomes vulnerable.

When I play the Russians, I find it useful to think of the German forces as a vicious dog tethered to the western and northern board edges. Don't fight the dog inside his tether. Just stay in front of him, back up and nick him where you can. When he reaches the end of the line, which in my experience seems to be at about hex row V on the southern half of the RB board, lay into him with everything you've got.

And know that he still might shred you.

That's life in the Barricades, baby.

To be continued... 

Thursday, October 03, 2019

RB/RO CG: Fire on the Volga (Pt. 1)

Note to readers: This post won't make a lick of sense to anyone who isn't familiar with the Advanced Squad Leader game system.

It has been a while. But, now that fall is rushing like a wave upon us here in the Pacific Northwest, there is no better time for taking up another of those endeavors that both torment and delight its practitioners: an ASL Campaign Game.

Specifically, Stewart King and I are undertaking to play a modified CG that combines the Red Barricades and Red October boards and OBs to become a massive, all-encompassing campaign that runs for 30 CG days! I attached the monikor "Fire on the Volga" and undertake here to maintain a blog of the CG as we progress. Stewart is an old friend and has agreed to refrain from reading my blog until such time as I give him permission.

You can get the specifics of our CG in the Prelude blog post.

Feel free to leave comments. Let me know if you think my setup is crazy, or if you find my strategy hopelessly flawed. Just be sure not to reveal anything about my game to Stewart (or vice-versa).


Back, once again, to the Barricades. For the umpteenth time. It's testimony to the success of the Red Barricades campaign game that, all these years later, and after multiple playings, I still look forward to this all-engrossing, mental tormenter of a game. And this time there is the added twist of incorporating the entire RO module into the bargain. Please refer to the Prelude for the specifics about how we plan to accomplish this.  

Fate has dictated that for this game, I am to play the Fascist aggressors, while Stewart has the part of the Communists. 

So, without further ado, let's get to it.

In past AARs, I have explained my thinking about the importance, in Red Barricades, of the riverbank for the Soviets. It's critical to keep the Germans off the river and out of important strategic locations like the Chemist's Shop and the Commissar's House. (I refer you, dear reader, to "A litany of Red Barricades truths" from a previous AAR.)

Does that mean I should push for the river on Day 1? I'm not sure. First, let's have a look at my given forces.

  • Rifle Coy
    467 x 12
    9-1, 8-0, 7-0
    HMG, MMG, LMG, Atr, Lt. Mtr.
  • Sturm Coy
    548 x 12
    9-1, 8-0, 7-0
    MMG, LMGx2, DCx2
  • PzIIL Platoon
    PzIIIL x 3
    8-1 Armor leader
  • 80mm OBA
    Normal
    Pre-registered hexes x 2
I have 15CCP for the day. The big choice is whether to buy a Sturm Coy or Rifle Coy as my 3rd company. And, since it's always good to open with a Big Punch, I'll opt for the Sturm company.  These, therefore are my purchases.


  • Sturm Coy (9CPP)548 x 12
    10-2, 8-1, 7-0
    MMG, LMGx2, DCx2

  • StuGIIIB Platoon (4CPP)
    StuGIIIB x 3
  • Stukas (early entry) 2 CPP

80mm Mortar pre-registered hexes
The 80mm OBA pre-registered hexes are set to smoke up the northern approach. Beyond this I cannot go until I see the Russian setup.

And here it is.

Reds are ready
The combined RB/RO map looks impossibly big when it's all laid out. How in the hell are the Germans supposed to conquer all of that?

A closer inspection reveals that Stewart has set up to defend the riverbank in force. But he looks strong all the way across the line. My first instinct is to think that the Russians are too far forward and ripe to be destroyed. But wherever I choose to attack, the fighting will be fierce right from the get-go.

A moment to consider...

And I think the rule of the day is audacity. An aggressive push for the river.

Hier kommen wir, Russen!
Pretty straightforward. My rifle company will enter on the northern board edge between hexrows G and Q. Very slowly, one hex at a time. Their turn 1 objective will be to get setup to engage the Russians on the upper levels and the rooftops. I notice that  Stewart has some Russians on the rooftops. Artillery spotter and light mortar teams, no doubt. My MG kill stack, which I hope to establish in G1, will soon be sited in on them. The PzIIILs will accompany the rifles across the debris field, laying smoke as necessary.

My Sturm company will enter strong on the west edge and push straight for Building F5. They will feint at Building B12, and if the going seems easy, they might send a platoon to take it. But I won't fight hard for B12. I'm pushing straight for the river with these guys. Under no circumstances will I activate the reserves that Stewart has placed to the south across the railroad tracks.

On turn 2, my reinforcing Sturm company will come in full bore at the river fortifications. I hope to maybe catch Stewart flat-footed. My turn 1 attack might suggest that my goal is the Manufacturing Hall or the string of buildings just east of the railroad tracks. But while my Rifles start shooting up his long range teams, and my Sturm company driving eastward, the Reds will suddenly be confronted by an armor-and-Stuka-supported Sturm company busting straight for his fortified area around V5!

I don't necessarily want to reach the riverbank on this day (and it's doubtful I could anyway), but if I can destroy that fortified area and establish my perimeter east of hexrow V, drive the Russians in the center to the south, and maintain a good CVP ratio, I'll count the day as successful.

That's an awful lot to ask, though.

Hey, man. Nobody said Stalingrad was gonna be easy.

Let's see how it goes...

Sunday, September 29, 2019

RB/RO CG: Fire on the Volga (Prelude)

Note to readers: This post won't make a lick of sense to anyone who isn't familiar with the Advanced Squad Leader game system.

Preamble

First off let me say thanks to MMP for publishing the Red October historical module for the ASL system. It's the sequel to the most successful CG in the entire ASL system: Red Barricades. I foresee many long hours of obsessive delight in my future.

That being said, it's become apparent to me that the playtesting of the various CGs contained within the module have left a bit to be desired. I've played CG I, X-Tag, and I've studied CG II Hubertus rather thoroughly, and I've concluded that they are both heavily stacked in favor of the German.

(A lack of play testing is a minor lapse, in my opinion. When one considers the time and effort required to play these massive games can we really expect multiple play testings  by multiple players before release? It's we, the players of the game, upon whom the responsibility of play testing must necessarily fall. The publisher gives us the concept, we put it to the test.)

Of course, the original Red Barricades module had balance problems with its CGs, as well. As I've discussed on this blog before, the Barrikady campaign game is about 80% pro-Russian.

But Stewart King and I have an idea that we hope may prove to be a fun CG that involves the entirety of both the RB and RO boards and the entire OBs from both modules. I present our idea here.

All factories, plus 9 of the 12 objectives

Fire on the Volga Campaign Game
Game length 17 Oct - 15 Nov
30 CG days
The entirety of both the RB and RO boards are used

CG VC: The German player wins if at the end of any CG day, there is a continuous German perimeter that includes all factories on both boards, plus the German controls all locations (even if isolated) 9 of the following 12 objectives:

RB board 
  • W9 (Chemist’s Shop) 
  •  BB18 (Commissar’s House) 
  •  GG21 
  •  AA25 
  •  V40 
  •  V42 
 RO board
  •  V1 
  •  Z8 
  •  BB9 
  •  All level 2 hill hexes (Slag Heap) 
  •  GG23
  • CC32 
SSRs

  1.  No depletion rolls. Purchases at full strength. 
  2.  Whenever a reserve unit is activated by a German attack or by proximity of a German unit, all reserve units within 5 hexes of that unit are activated as well. 
  3. For CCP replenishment, ignore all modifiers other than historical modifiers. Add 3 CPP to the result. Example: Russian player rolls 12. Historical modifier is 0. Result: 13 CPP. Add 3 CPP. Russian total for the day is 16CPP. 
  4. Disregard the campaign balance provision. 
  5. Each CPP spent on Fortifications is worth the following: German 40FFP, Russian 80FFP 
  6. Whenever an armor platoon is recalled, the German receives 1 CPP for each surviving recalled tank with functioning MA and MGs on the following CG day. 
  7. Russian RO CGI starting forces (including FPP but not any CPP) are deployed on the RO map as reserves starting on 17 Oct. They must be deployed as reserves on that map (though they may be repositioned before each CG day [EXC: Fortifications) until activated or the 23 Oct turn. On 23 October, they may be deployed on-map (either map) as desired. If the Germans enter the RO map at any time before 23 October, all RO reserves are immediately activated. 
  8. The German RO CGI starting forces (though not the CPP from the RO CGI starting lineup) enter as reinforcements on 23 October. The German entry area includes all west edge hexes, plus any north edge hexes as per the RB rules, starting 23 October. Starting 23 October, both sides make 2 CPP replenishment rolls each CG day. Starting on 23 October, both sides may choose reinforcement groups up to the maximum allowed in RB CG III, RO CG I and RO CG II. 
Notes 

In effect, this CG begins as a normal RB CGIII game and proceeds as such until 23 October, eight CG days into the game. In my experience, 8 days in is just about where the Germans start to lose their steam. But in this case, on 23 October, the Germans get a big infusion of fresh troops.

When Hubertus comes, on 11 November, 3 days before the CG ends, the Germans will get their -3 historical modifier which may be the last bit of fuel they need to attain their objectives or to fall just short of them.

Who knows if this is balanced? But we think it will be fun. It will literally take years to complete this game, but what the hell? We're gamers, after all. If anyone else wants to give this a try, let us know! Stewart and I will be maintaining a blog of our game as we go along, so stay tuned...

Thursday, September 26, 2019

ASL ROCGII: A hopeless case

Note to readersThis post won't make a lick of sense to anyone who isn't familiar with the Advanced Squad Leader game system.


Preamble

The Sound and Fury desk is mighty dusty. If the boss walked in and saw this, he would not be happy. Let's see if we can spruce things up a bit.

Our return to form is another of our favorites: a write-up of an ASL campaign game. And this time it's for the long-awaited follow up to the best ASL CG of all time (and the only one that really works in my opinion): Red Barricades.

(Valor of the Guards? Give me a break! The Barricades is where real men cut their teeth.)

My joy at finally receiving this module can only be hinted at with words. Escapism! Obsessive organization! Calculating! Recalculating! The agony! The ecstasy! And so, immediately upon receiving the module and lacking an opponent, I set to work creating Russian defenses in anticipation of eventually finding one.

But when I arrived at CGII, the Hubertus campaign I was flummoxed. When I set up the perimeter and looked at the respective OBs I determined that the Russians have no chance to win this game. I'm convinced this is an error on the part of MMP.

(If there are political sensibilities around criticizing MMP publicly, I'm blithely unaware of them. This is just what I see, regarding the game.)

Sorry, Ivan. There's just no way...
Allow me to explain.

When I create a defensive set up for a CG, I try first to determine the most vital points of defense. A look at the RO map instantly reveals that the northeast edge of the board is crucial for the Reds. Their reinforcement groups must enter on or between hexes JJ0 and JJ16 unless these hexes are no longer under Russian control, in which case the Russians may enter on the southern board edge. This makes the approaches to these hexes vital for the Russians. A shrewd German player will extend his perimeter 4 or 5 hexes short of the board edge, then in subsequent CG days, set up a devastating kill zone into which all Russian reinforcements must enter.
German Day 1 perimeter goal. Reds must not let this happen!

So, clearly, the Russian must avoid this situation at all costs. But when you look at the starting perimeter, the Germans are already three-quarters of the way across the map. Indeed, the Russians have been driven from all the factories except for the Martin Ovens in the middle of the board, which is surrounded on 3 sides. In fact, the Germans already have two toeholds toward the eastern edge of the Ovens in hexes X23 and V23. How many resources is a wise Russian player going to dedicate to defending that foregone conclusion?

Oh, hell no!
My initial thought, as the Russians, was to set up a defense of the easternmost hexes of the Martin Ovens, and to fight like hell to protect the vital entry area. But then I looked at the German OB that I would be facing.

The Russians are given 3 elite companies, a heavy weapons platoon, some AT and ART pieces, 85 FPP, and 12 CPP.

The Germans are given 3 elite companies, 4 rifle companies, an infantry battery, a platoon of STGIII smoke-layers, and 17CPP.

That, my friends, is a wipeout.

Consider this German strategy for Day One.

Purchases

Considering the manpower advantage the German is given to start the game (7 coy to 3 coy), I wouldn't bother purchasing infantry. My purchases would be thus:

150mm OBA w/pre-reg = 7 CPP
80mm OBA w/pre-reg = 3 CPP
HW Platoon = 6 CPP

Total CPP: 16, save 1 CPP for the next day.

Push to set up the perimeter for Day Two.

The German player should recognize the importance of the JJ0-16 hexes to the overall CG immediately. Therefore, the spearhead of this awesome OB should be aimed directly at it.

Ouch.
In this avenue of attack, the vital points are buildings V1 and BB9, plus the Slag Heap. So, I set up a Sturm Company to attack V1, the Pioniers to attack BB9, and the other Sturm company to attack the Slag Heap. Further, in support, I pre-register hex BB11 for the 150mm module and hex AA9 for the 80mm Smoke FFE. Since this attack is so vital, I also add in the StgIIIBs and dedicate my HW platoon to raking the Slag Heap and building BB11. Given that the Russians are stretched beyond their capacity, it's doubtful that they will do much to defend build V1. And whatever they put in BB11 and on the Slag Heap will be vaporized in short order.

Containment and attrition

Everywhere else on the map, it's about containment and attrition. I've got 4 rifle companies that will surround any Russian pockets, advance to contact, and then maintain position. The key is to keep the Russians from expanding the perimeter in the south. Not that it matters all that much. That infantry battery will start pounding away at building GG23 to soften thing up for the next day.

On Day 2, the Rifle companies will man the perimeter in the northeast, to shoot up Russian RGs as they enter, while the Pioneers and Sturm companies will begin reducing Russian pockets in the now-isolated factories.

Contain, don't attack

This is a pretty general description of a German plan, but it's as obvious as the nose on your face.

And, hey, if you think I'm wrong, go ahead, Ivan! Set up your Elite SMG company, and your 2 Guards Rifle companies, your HW platoon, your 85 FPP, and your 12 CPP and see if you can stop me.

Some folks claim that this is an intentional disadvantage placed on the Russians to simulate the desperate situation they faced historically during Hubertus.

Well, that's as may be, but in terms of a competitive game, as printed this is not worth playing.

Monday, December 05, 2011

ASL RBCGIII: Stand fast, Comrades! (Prelude)

Note to readers: This post won't make a lick of sense to anyone who isn't familiar with the Advanced Squad Leader game system.


Greetings fellow ASL players!

Dave and I are at it again.  This time the game is RBCGIII.  The big one.

As the game progresses, each of us will maintain a blog correspondence.  We've a Gentleman's Agreement that neither of us will read his opponent's blog until given express permission to do so. 


You can read Dave's blog here.

Readers are encouraged to comment!  Speak your piece! Just be sure not to inadvertently reveal any information about Dave's plan to me or vice-versa. 


Also, I'd be remiss (and have been remiss) in failing to express my gratitude to Rodney Kinney, the designer of the VASL game engine, which is the source of the illustrations Dave and I will use for our blogs.  Thanks, Rodney!  You're a good egg, old bean.

An attempt at balance

Here we go.  Winter is nearly upon us.  And winter is the perfect time to initiate that most engrossing of indoor activities:  a Red Barricades campaign game.

I'll tell ya:  get a fire in the fireplace; your wife and her friends are cookin' in the kitchen; you put on some music; burn a little ganja; then you and your buddy spend the day trading punches on the big RB map...  Folks, that's high-livin' in my book.

I certainly can't remember how many campaign games Dave and I have played over the last 15 or so years, but we must be approaching two dozen by now.  Many hours hunched over the gaming table.

And, as much as we enjoy the campaign games, we've come to the conclusion that none of them, CGI, CGII, or CGIII, is balanced.  In our experience, CGI and CGII are nearly impossible for the Russians to win, while CGIII is unwinnable for the Germans.  (Of course, dear reader, your experiences may differ.  I'd be interested to hear other perspectives.)

So, this time, Dave and I are incorporating some "house rules" into the CGIII campaign to see if we might arrive at a more balanced campaign.  Specifically, we've changed the CG victory conditions and made some modifications to the rules.
CG Victory Conditions:  At the conclusion of any CG day, the German wins if he can draw a continuous perimeter that controls all but 5 stone locations west and north of the M45/U37 road, west of hexrow U, plus Buildings X9 (The Chemist's Shop) and B18 (The Commissar's House). 
All but 5 locations to the left of the line, plus Chemist Shop and Commissar's House
In our experience, the Germans simply do not have enough resources to attain the CGIII Victory Conditions set forth in the ASLRB.  So, rather than require that the Germans control all but 5 stone locations anywhere on the board, we've cut off the easternmost third of the map for victory determination.  And given the vital importance of the Chemist's Shop and Commissar's House, we've also required that the Germans include those buildings within their perimeter.  (I wrote up an explanation of why I think those buildings are important at the beginning of our last campaign game, which you can read here.)

Changes to CG rules

In addition to changing the VC, we're modifying the campaign rules to help the Germans a bit.
  1. Disregard the campaign balance provision.
    In our experience, the Germans nearly always win the first 4 or 5 days of any campaign, thereby invoking the balance for the Russians.  After the first few days, the Russian can pretty much count on 18CPP in the refit phase.  We want to rectify that. 

  2. For CPP replenishment, ignore all modifiers other than the historical modifiers.

  3. No depletion rolls.
    We've decided to forgo depletion rolls for this CG.  All purchases are at full strength.

  4. Armor recall/return.
    We're adopting a rule wherein if a tank platoon is recalled at the end of a CG day, it will return to the battle if the player rolls a "1" during a subsequent Refit Phase.  When a tank platoon returns, it enters as reinforcements and is again subject to recall at the end of that CG day.  If a tank platoon is recalled a second time, it is gone for good.

  5. The Germans replace one Pioneer company for a Sturm company and another Pioneer company for 2 rifle companies in the total forces available.

  6. Stuka reinforcements consist of 2 '42 Stukas with bombs.

  7. Flame-throwing tanks.
    Each player may expend 1CPP in the purchase of a tank platoon in order to exchange one tank in that platoon for its equivalent flame-throwing tank.  The Germans may do this twice in the campaign; the Russians once.  This is a piece of chrome we're adding just for fun.
All of these modifications work to the German advantage, in our estimation.  And it may be that we've gone too far.  Or maybe we haven't gone far enough.  I guess we'll see...

We agreed on all these modifications before determining sides.  That way, we removed any subconscious advocacy for one side or the other.  At least, theoretically.  Once we had it all worked out, we selected sides randomly.

Guess what?  I'm the Reds.  Again.  But that's okay.  I've already got some ideas for nasty traps.  Come on in, Jerry!  We're waiting.

We'll start playing in the next month or so.  Stay tuned...

To be continued...

Tuesday, February 08, 2011

ASL Red Barricades: Today the Volga, tomorrow the Vistula (Pt. VIII)

Note to readers: This post won't make a lick of sense to anyone who isn't familiar with the Advanced Squad Leader game system.


Dave Hauth and I are engaged in a playing of RBCGI:  Into the Factory.  I'm the Reds.  He's the Jerries.

We're each maintaining a blog correspondence as the game progresses.  We've a Gentleman's Agreement that neither of us will read his opponent's blog until given express permission to do so. 

Readers are encouraged to comment!  Speak your piece! Just be sure not to inadvertently reveal any information about Dave's plan to me or vice-versa. 

You can read earlier episodes of my account:
You can read Dave's blog here

"When defeat is inevitable, it is wisest to yield"

The above quotation is from the Roman rhetorician, Quintillian.  I find it sufficient to express my sentiments now that I have conceded defeat in this great game that Dave and I have played.

Day 8 was a nightmare for me. Dave's purchase of Assault Engineers (on-board, no less!) caught me by surprise and I had no answer for the overwhelming firepower that he brought to bear.

He was careful not to activate my reserve units, which meant I was fighting a battle at a 1 to 2 disadvantage.

And while I did my best dealing out 6, 8, or 12 firepower attacks, I was subjected to attacks of 24 and 30 firepower, directed by ruthless German leaders.  It was hopeless.  A count of CVP at the point of concession showed that Dave was on track not to double, but triple my score.

Approximate perimeter at the point of concession
I hate to quit if there is even a slight chance of victory, but as my forces dissolved around me, I had to face the music.  It's been a great game.  I've enjoyed the hell out of it.

I think I made a couple mistakes that contributed to my defeat.
  • I was too cavalier with my big tanks.  I lost 4 of my 6 best tanks due to carelessness.  (Please refer to the Aftermath of Day 6.)
  • On the last game day, I should have purchased my reinforcements on-board.  I think I was still playing a game of position, while Dave had correctly made the transition to a game of attrition.
But none of this mitigates the fact that Dave played a great game.  Come October, we might start a game of RBCGIII with some modifications that we hope will address issues of balance.

Thanks for following this game, everybody.  Maybe I'll see some of you at Enfilade this May.

Friday, January 28, 2011

ASL Red Barricades: Today the Volga, tomorrow the Vistula (Pt. VII)

Note to readers: This post won't make a lick of sense to anyone who isn't familiar with the Advanced Squad Leader game system.


Dave Hauth and I are engaged in a playing of RBCGI:  Into the Factory.  I'm the Reds.  He's the Jerries.

We're each maintaining a blog correspondence as the game progresses.  We've a Gentleman's Agreement that neither of us will read his opponent's blog until given express permission to do so. 

Readers are encouraged to comment!  Speak your piece! Just be sure not to inadvertently reveal any information about Dave's plan to me or vice-versa. 

You can read earlier episodes of my account:
You can read Dave's blog here.

Aftermath of CG Day 6

CG Day 6 saw the most savage fighting yet of the campaign game.  The Germans suffered 69 CVP, while the Russians suffered a whopping 110 CVP!   The fighting took place in three sectors.

Day 7 perimeter
In the north, where I had set up for a diversionary attack toward the O10 factory I received a nasty surprise.  I pushed my two T34 M41 tanks way out to the west on Turn 1, determined to crush a German machine-gun nest in hex P5.  But on Turn 2, to my surprise, Dave entered a Sturm company on the northern board edge!  My tanks were caught in a bad place without infantry support.  They succumbed fairly quickly to the marauding shock troops.  From there, Dave pushed southward toward the Chemist's Shop.  My two platoons of infantry and the 82mm Mortar did what they could to stop him, but I was out-manned and out-gunned.  At the end of the game (which lasted 7 turns), Dave had control of the Chemist's Shop and had annihilated all my troops in the area.

In the factories, Dave set up his shock troops in big stacks, which he then used to pulverize my conscripts as he pushed eastward.  He made good progress, seizing the R23 factory and all but the few southernmost hexes of the P21 factory.  Once again, his eastward progress was stopped only by some desperate intensive fire by my 76* howitzers, one of which went to its reward.

The big counterattack I had planned for the south succeeded nicely.  I was not only able to completely win back the P33 factory, but I annihilated the Germans guarding that factory and put a big hurt on Dave's reinforcing rifle company that came hustling in from the western board edge.  My T34 M43s were unstoppable down there.

Dave sees this...
The stake is in the ground

There is no retreating at this point.  Just stand here and slug it out.  My retained forces are these:
  • 9-0 x 2, 9-1 x 3, 8-1, 8-0 x 3, 7-0, 6+1
  • 82mm Mtr.
  • 76* INF 
  • T34 M43 x 3
  • T60 M42 x 2 (dug-in hexes T31 and V31)
  • 628 x 9
  • 527 x 3.5
  • 458
  • 447 x 2
  • 426 x 4
  • 228 x 2
  • .50-cal HMG, HMG, MMG x 2, LMG, Lt. Mtr., Atr x 3, German Lt. Mtr., German Atr x 2
  • OBA Module 80mm Mtr (scarce ammo, pre-reg hexes Q33, U38)
Looking over this list, it is obvious that my casualties from Day 6 were huge.  At the end of that day, the Germans had twice as many squads as the Russians.  I don't know that I've ever seen that be the case this far into a campaign game.

Which brings up another point:  the way this game is playing, with neither side gaining any clear advantage, it is conceivable that we could play out the campaign all the way to the end.  I've never seen that happen before, either.  Dave and I are in uncharted territory here, as regards Red Barricades.  It should be interesting to see how it plays out.

Day 7 setup
Once again, I'm awarded 18CPP for the coming day.  My purchases are these:
  • I2 Guards SMG Coy (reserve)
    628 x 9
    DC
    8-1, 9-0

  • I3 Rifle Coy (reserve)
    447 x 12
    HMG, MMG, LMG, Atr., Lt. Mtr.
    9-1, 9-0

  • I4 SMG Coy
    527 x 9
    9-0

  • A2 T70 Pltn (dug-in)
    T70 x 3
    8-1 AL
    I'm pretty sure Dave will be buying armor for this campaign day.  He needs it.  But I can't afford to buy a proper AT Battery, so I'm settling for a platoon of dug-in T70s with their 45L guns that could prove troublesome to incoming German armor.  More about these later.

  • M1 80 Fortification points
    AT Ditch
    Trench
    HIP:  Squad, HS, SMC x 3, AFV x 6
    ? x 14
I'm more or less compelled to buy 3 infantry companies after suffering such devastating casualties.

Day 7 setup, north
On Day 6, Dave took the Chemist's Shop, as told.  So the noose is closing in the north.
I've set up my reserve rifle company in the Commissar's House and vicinity.  They get the duty of doing what they can to guard the riverbank.

I've got a hidden .50-cal HMG on the second level of the Commissar's House.  Dave will certainly know that there is something hidden somewhere on the second level, but he still has to deal with the fact of it.

I've got a hidden spotter in GG21, sighting for the surviving 82mm Mortar. 

Unfortunately, the weather for Day 7 is clear, and that means one thing:  Dave will be buying Stukas.  So, in anticipation of that unhappy development, I'm setting up my T34s in the factories, where they will stay and support the infantry.  I'm spending 30 Fortification points to hide them and the dugin T70s, as well.  I'll keep the T34s hidden for as long as possible, hoping to avoid the Stukas and maybe just catch Dave by surprise here and there.

Day 7 setup, south
In the south, I'm starting to fortify the P33 factory.  This may be where the Red Army is forced into its final stand.  An AT Ditch in O34 makes it less easy for German tanks to enter the factory.  And two of my hidden T70s are poised on the flanks to open up as the Panzers approach from the west.

My reserve Guards SMG company awaits the Germans within the factory, and I've still got my 80mm Mortar OBA module to assist in the defense.

My reinforcing SMG company will enter wherever the need seems most dire.

My Red Army heroes and the mighty Sixth Army are approaching a culmination.  Now is not the time to lose our nerve.

To be continued...

Friday, January 14, 2011

ASL Red Barricades: Today the Volga, tomorrow the Vistula (Pt. VI)

Note to readers: This post won't make a lick of sense to anyone who isn't familiar with the Advanced Squad Leader game system.


Dave Hauth and I are engaged in a playing of RBCGI:  Into the Factory.  I'm the Reds.  He's the Jerries.

We're each maintaining a blog correspondence as the game progresses.  We've a Gentleman's Agreement that neither of us will read his opponent's blog until given express permission to do so. 

Readers are encouraged to comment!  Speak your piece! Just be sure not to inadvertently reveal any information about Dave's plan to me or vice-versa. 

You can read earlier episodes of my account:
You can read Dave's blog here.

Aftermath of CG Day 5

Nasty fighting in the factories!  Here's the perimeter for the end of CG Day 5.

Day 6 Perimeter
As the day started, Dave was poised for a big attack into the P33 factory.  He had a huge force set up to attack into it from the south.  But the ambush that I had set for him around the T38 bridge bloodied him up before his attack could really get underway.  Eventually, his forces rallied and pushed east of the P33 factory to meet my reinforcing rifle company and T34s.  A fight developed within the factory and in the buildings just to the east.  It went back and forth, but in the end, I not only held my ground in the factory, but gained a hex or two.  All of this came at a huge cost to both sides.

In the middle of the map, Dave dropped a 150mm artillery module that missed its targets for the first two turns of the game.  He finally got it dialed in where it tore up some of my trench lines and destroyed my fortified building with the 9-1 leader and MMG.  But his attack in the R17 factory didn't go anywhere either.  And I don't think Dave got sufficient return on his investment with the big artillery.  On the last turn of the game, I was able to break Dave's 10-3 leader, who was directing a huge machine-gun stack, using spotted 82mm mortar fire.  I then managed to get a rifle squad into close combat with the 3 vehicular crews that manned his machine-guns, kill them, and capture 3 German HMGs and an MMG.  Big score at the end of the game.

Dave made the most ground with his reinforcing rifle company which charged into the P21 factory and chased away my conscripts.

I'm very happy with the day's results, but I can't imagine Dave is too upset about them.  The Germans suffered 41 CVP.  The Russians suffered 63 CVP.  So, even though Dave didn't gain much ground, he still met his goals for casualties.

On the whole, I'd say the day went in Dave's favor.  But I'm getting stronger all the time.  And I'm sure Dave knows that each day that the campaign continues, his prospects diminish.

Hang on, lads!

My retained forces are these:
  • 10-0 (wnd), 9-0 x 3, 9-1 x 2, 8-1, 8-0, 6+1
  • 82mm Mtr. x 2
  • 76* INF x 2
  • 628 x 7
  • 458 x 2
  • 447 x 8.5
  • 426 x 11.5
  • 228 x 2
  • 127 x 3
  • .50-cal HMG, HMG, MMG x 2, LMG, Lt. Mtr x 3, Atr x 2, German HMG x 3, German MMG
Note the big heap of German machine-guns I grabbed from Dave after his 10-3 leader beat feet out of the way of my mortar.

Dave sees this...
With the campaign balance provision, I am awarded 18CPP.  My purchases for the day are these:
  • I5 Milita Coy
    426 x 12
    MMG, LMG, Atr, Lt. Mtr.
    9-1, 9-0
    This is my last militia company.  I rolled snake-eyes on the leadership roll and so got 2 very decent leaders:  Pasha Ivanovich, the former machinist from the tractor factory, whom the men call "Little Cousin" because he is scarcely more than a boy in years, and kindly, proud Comrade Bezuhov with special letters of commendation from Comrade Brezhnev.

  • I4 SMG Coy
    527 x 9
    9-1, 7-0

  • A4 T34 M43 Pltn
    T34 M43 x 3
    With these hammers, I will seek the German nail heads!

  • A1 T60 Pltn (dug-in)
    T60 x 3
    Now that the lines have solidified, my little dug-in machine-gun nests may fare better than they did on Day 2.

  • +1 additional pre-registered hex for my retained 80mm OBA module
    I've had this module hanging around for 2 days, but now I have a plan... Pre-register hex U38 so I can smoke the bridge over the gully...

  • M1 40 Fortification points
    Trench
    HIP:  Squad x 4, HS, crew, SMC x 3
    ? x 15
Day 5 setup
The Plan 

As I was making my purchases, it suddenly struck me that the Red Army is strong. Very, very strong.

There is a point in any Red Barricades campaign, and it happens quite suddenly, when the Russian becomes too strong for the German to overcome. Looking over my OB and my position on the map, I believe we have reached that point. Dave and I haven't discussed it, but I wonder if he might sense it, too. 

After two campaign days of high-casualty but indecisive fighting, the Russian position has gone from just a hair shy of hopeless to indomitable.  Just take a look at what I've got.
Day 5 setup, north
In the north, the front is fully manned.  I plan to hunker down and hold my ground for the most part.  I've placed my two remaining T34 M41 tanks (with Inexperienced crews) up by the Chemist's Shop as a decoy.  I will make a small attack toward the O10 factory, leading with the tanks.  I'm hoping that Dave, espying my tanks, will set up to crush such an attack, leaving him weaker in other areas.

 Day 5 setup, south
My objective is to have undisputed control of the P33 factory when the game day ends.  I've set up in a defensive posture in the northern portion of the factory.  My hope is that Dave will choose to load up P33 with Sturm troops and point them northward for an assault into the R27 factory

As he steps off his attack, I hope to give him a nasty surprise.

Counterattack for the P33 factory
I've hidden a platoon of elite SMG troops south of the gully.  On Russian Player Turn 1, my 80mm Mortar module will drop smoke to cover the bridge.  The T34s will enter on the southern board edge, and my hidden platoon will make their move northward.  Hopefully, Dave's troops in the P33 factory will be caught between hammer and anvil.

It's a chance for a big score.  It could even prove decisive for the campaign.  We'll see...

Scheduling difficulties indicate that it will be a while (a month?) before we can next play.  I can't wait, dammit!

To be continued...

Friday, January 07, 2011

ASL Red Barricades: Today the Volga, tomorrow the Vistula (Pt. V)

Note to readers: This post won't make a lick of sense to anyone who isn't familiar with the Advanced Squad Leader game system.


Dave Hauth and I are engaged in a playing of RBCGI:  Into the Factory.  I'm the Reds.  He's the Jerries.

We're each maintaining a blog correspondence as the game progresses.  We've a Gentleman's Agreement that neither of us will read his opponent's blog until given express permission to do so. 

Readers are encouraged to comment!  Speak your piece! Just be sure not to inadvertently reveal any information about Dave's plan to me or vice-versa. 

You can read earlier episodes of my account:
You can read Dave's blog here

Aftermath of CG Day 4

On the fourth day, the Jerries rested.

At the end of CG Day 3, the German ELR dropped from 4 to 3 which (I presume) Dave interpreted as an indication that he should take an Idle Day.  A prudent decision and I'm not really surprised.  I had even toyed with the idea of choosing an Attack chit to press him while he was down, but I didn't really have the strength to pull it off.  As it stands, we're squared off for a big fight on Day 5, which makes me nervous.  I know I'll be facing at least 2 fresh Sturm companies on the new day.

 Day 5 Perimeter
Lay on, Macduff!

One thing is sure:  coming off an Idle day, the Germans are going to throw a big punch.  Hopefully, I'm strong enough to withstand it.  My retained forces are these:
  • 628 x 12
  • 447 x 8.5
  • 527 x 2
  • 426 x 19
  • 228 x 2
  • 10-0, 9-1 x 3, 9-0 x 3, 7-0 x 3
  • MMG x 2, Atr x 2, Lt. Mtr. x 2, DC
  • 76* INF x 2 
  • 80mm mortar module, pre-registered hex, scarce ammo
Dave sees this...
I am allotted 17 CPP for the day.  My purchases are these:
  • A3 T-34 M41 platoon (inexperienced) 5CPP
    T-34 M41 x 3

  • I3 Rifle Coy (depleted) 5CPP
    447 x 9
    HMG, Atr, Lt. Mtr.
    9-0, 8-1

  • I7 Heavy Weapons platoon 6CPP
    MMG x 2, HMG, 50-cal. HMG
    82mm Mtr. x 2
    127 x 4
    228 x 2

  • M2 Fortification point 1CPP
    HIP Squad
    HIP crew x 4
    HIP SMC x 3
    Trench
    Roadblock
    ? x 10
Day 5 setup
Normally, I would buy 2 infantry companies in order to make full use of my manpower advantage.  But my troops are so short of hardware after the first 3 days of fighting that I feel compelled to buy a Heavy Weapons platoon.  I need some range and firepower.

The weather for the day is overcast, so I can safely buy a T-34 platoon without worrying about Stukas.  But I had a most unfortunate roll for my armor leadership, resulting in Inexperienced crews for my tanks!  To add to my woes, my reinforcing Rifle company is depleted.  But at least the Heavy Weapons platoon is full strength.

Day 5 setup, north
In the north, I've placed two platoons of Guards SMG troops in the Chemist's Shop.  Their purpose is twofold:  1) Guard against a German attack from the northern board edge; 2) If no such attack develops, press to infiltrate the O10 factory.  The mere presence of these troops poses a threat on the German flank, so I don't think Dave can ignore them.  Thus, they serve to take pressure off other points along the front.  They're supported by a hidden HMG and 9-1 leader in over-watch position. 

I've set up my entire Heavy Weapons platoon HIP to hopefully catch some Germans at unawares as they run from cover to cover.  My 50-cal. and another 9-1 leader are hidden in the upper level of hex GG21 where they can see down the equator, but are relatively safe from attack.  The conscript on the rooftop in CC20 is there to strip HIP status from any German artillery observers on factory rooftops and to act as a spotter for the big mortar in DD19.

I've got two platoons of rifle squads and the two howitzers protecting the crucial area between the R17 and U22 factories.

Day 5 setup, south
My brave militia troops get the sad task of holding ground in the middle factories.  Tough job, and one has to imagine that not many of them will be making it to the chow line at the end of the day.  But that is where I expect the Germans will punch hardest and, in the cruel calculations of war, conscripts are easy to come by.  (Especially in Stalin's Soviet Union, eh?)  Besides, the terrain is such that their poor range will not be quite such a disadvantage.  And, they get that Fanatic bonus in the factories.

My 80mm mortar artillery is still trained on the O33 factory.  I've got a couple platoons of Guards SMG troops down there, plus an 82mm Mortar.  These units are charged with holding their ground until my reinforcing Rifle company and T-34s arrive to assist them.  Then, depending on the situation, I might try to expand my foothold in this factory.  I've got an ambush set near the T38 bridge to surprise any Germans that use Stalnaya Street to advance on my southern flank.

I'm very glad that Dave has used both of his allotted Nebelwerfer modules.  A rocket barrage today would be devastating.  As it is, I won't be surprised to see some big German artillery come raining down.  But it will be hard for his observers to get a purchase on my position.  And any radio-operating Germans on factory rooftops will soon discover my hidden machine-gun nests.

We're scheduled to play tomorrow, January 8th.  This day could be decisive either way, or it could end without either side having a clear advantage.  We'll just have to see...

To be continued...