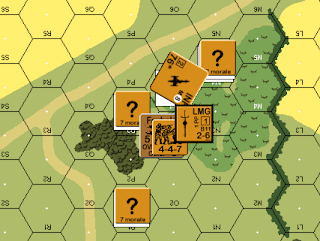
Greetings fellow ASL players! After a several-year hiatus, an old familiar sound has returned to the Cariaga Hacienda: the merry clacking of dice tumbling through the tower. That's right! I'm plunging once again into a world of hours spent hunched over a game table arranging little squares of cardboard on a map while nimbly performing arithmetic calisthenics. In a word, ASL.
As usual, my nemesis, Dave Hauth, is the face across the table. And the game? Clearing Kamienka by Vic Provost. It looks like a barn-burner. A mostly infantry fight pitting elite Wehrmacht troops against sturdy Russian rifles in the early days of Barbarossa.
Dave and I are both going to blog our experience as we go. We've a Gentleman's Agreement that neither of us will read his opponent's blog until given express permission to do so.
You can read Dave's blog here.
Readers are encouraged to comment! Speak your piece! Just be sure not to inadvertently reveal any information about Dave's plan to me or vice-versa.
Thanks to Vic Provost for designing this great-looking scenario. And thanks to my old friend, Rodney Kinney for developing the VASL gaming engine which I've used to capture images.
Well, here we go. Barbarossa, July 1941. German units are pouring across the frontier, swallowing up whole armies of Russians.
According to the arcane meta-game rules that Dave and I have developed over decades of gaming together, I have choice of sides for this engagement. I choose the Reds. They have a strong defensive position, plenty of cover, and the potential to set up some lethal ambushes for Germans advancing across soft terrain. (Besides, I'm something of a leftist.)
The German force I'm facing is awesome. Assault engineers with all their toys, great leadership, big ordnance, elite troops , a platoon of assault guns --that's quite a bit.
Both sides receive reinforcements at different points in the game.
The Victory Conditions state that the Germans must control at least 24 building locations east of hexrow P. A quick tally off the map reveals that there are 30 such locations in total. Therefore, in order to win, I must retain 7 building locations east of hexrow P. By SSR, any locations that are rubbled or ablaze count as German-controlled, and given that the German OB includes a 150mm howitzer, it is not unlikely that we will see some rubbling and fire-setting in this game.
So, taking all this into consideration, here's what I came up with...
 |
| Clearing Kamienka set up. Acquisition markers indicate bore-sighted locations. |
My turn 1 reinforcements, which arrive on the western half of the northern board edge, will hustle into the buildings on board 42 to await the Germans when they overwhelm the board 43 defenders. (And they will overwhelm them.)
Organizationally, I've divided my on board forces into three groups. Facing west, we have: center, left flank and right flank.
Center
 |
| Central defense |
Left flank
I've placed 7 of my 12 allotted dummy counters in this area to make it appear stronger than it is. There are only 2 actual units over here: the 76* howitzer, which is set to subject enfilading fire on Germans approaching the board 43 building cluster through the grain, and a 447 with LMG that is there to protect the gun from infantry. If the Germans push for the P2 woods cluster, the units in 43O7 will fire to interdict.
Right flank
 |
| Counting on those reinforcements. The 447 with the ATR is hidden. |
The commissar and MMG in 43L10 can offer some crossfire support if the German approaches this position through the grain, as can the 447 with LMG in 43N9.
Summa
I've aimed to put as much fire as I can onto the two big grain fields on either board that represent the most direct approach to the victory buildings.
The German force is intimidating. But we Reds are a wiley bunch. If I can avoid his hay-makers and nick him repeatedly, I can whittle him down so that he doesn't have enough at the end of the scenario to succeed in his final push.
 |
| At your leisure, Herr Hauth. Russian set up as seen by German player. |
Update: Alas and alack! Dave and I got around to playing this game two days after Christmas. Our playing revealed it to be strongly unbalanced in favor of the Russian. Dave fired smoke with his big howitzer and two of his tank destroyers, but it wasn't enough. The Germans advanced into murderous fire. As strong as is the German order of battle, it's not enough to overcome the strength of the Russian position. I think, with a few adjustments, this could be a tight scenario and a lot of fun to play for both sides. My considered recommendation for balancing this game are these:
- Remove the radio and 80mm Mtr OBA from the German OBA and replace it with a guaranteed Smoke FFE which occurs during the turn 1 German Prep Fire phase in a hex designated by the German player prior to all setup.
- Allow the Stugs, AA gun, and 150mm howitzer to set up on either board, within the German setup area. Remove the unarmored half-tracks from the German OB.
- Disallow Russian bore-sighting.


